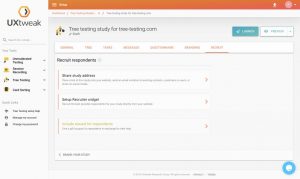
What is Tree Testing?
Tree Testing is a UX research method used to find out if all the information on your website is easy to find and navigate. It helps you make sure that users won’t get lost or confused on your pages and allows you to provide them with a smooth user experience.
The process of tree testing is very simple, especially when using online tools. If you still don’t know which one to choose, feel free to go back and read our reviews summary. Once you sign up for one of those, we can jump right in and create the first tree testing study.
You need to provide the testers with a list of tasks to complete and show them the hierarchical structure of the website (i.e. it’s menu with all the categories and subcategories). The participants then need to go through the structure and attempt to find solutions to the given tasks.
Let’s explore the world of a tree testing a bit more together. In this piece I am glad to show you the basic principles of how tree testing works, explain what is tree testing in UX, what are the key steps of it and what you should never forget to think about when planning a tree testing study for your website or other project you plan to improve.
What is tree testing in UX?
Tree testing is a great UX research method that improves your product’s UX in a number of different ways. With the insights obtained from a UX tree testing study you’ll find out if your website is user-friendly and easy to navigate or is it just confusing and stresses users out.
Tree testing helps to evaluate the structure of your website, pinpoint confusions and potential areas of improvement.
UX tree testing can help to get answers to questions like these:
- Do people comprehend labels in the way they were intended?
- Is the content divided into groups that users find intuitive?
- Is it logically organized for users?
- Is it possible for consumers to find the information they need quickly and easily?
- Is it possible that they’re seeking it elsewhere?
- What’s keeping them from finding the information they’re looking for?
By analyzing the results of a tree testing study you can change the navigation structure to aim for optimal performance and discover faults with your information architecture.
To sum it up, tree testing in UX helps with 4 main things:
- Improving the IA of your website
- Evaluating the results of card sorting
- Finding where your users get lost
- Uncovering confusion points
Below, we’ll show an example of tree testing UX study.
Let's take a look at the example
We can divide the whole tree testing process basically into two parts:
the preparation and execution phase, both similarly important or better said, the tree testing would not be successful if you would skip any of them.
The preparation takes place primarily in offline. It also can be off computer with pen and paper as tools and your mind in charge. That means you need to think about why you want to conduct a tree testing study, what you will use the outcome for and what the next actions steps will be.
Once you are all set with that, you can open the software and start – the execution phase comes. We can unfold it into more steps and we are going to look at them a bit more in detail. You can red about creating the content of the study (both the tree and the tasks), finding your testers and getting the best out of the results.
So let’s move onto what you should focus on and what not to forget going step by step.
HOW TO BUILD THE TREE STRUCTURE
The term tree represents your website structure. If you ever heard about “sitemap”, these two are like siblings in a ways. It means it pictures your websites like a tree with all the bigger and smaller branches as your categories and subcategories.
You can test only a specific section of your tree, but you should show it as a whole to get the results in full context. If you would exclude part of it your testers might understand categories incompletely or don’t see the differences between.
There are more possibilities to build the tree in your app. The most common ones are the three described below. You can see the examples of how it looks like on the screenshots from the UXtweak app.
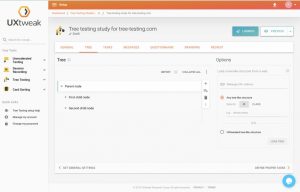
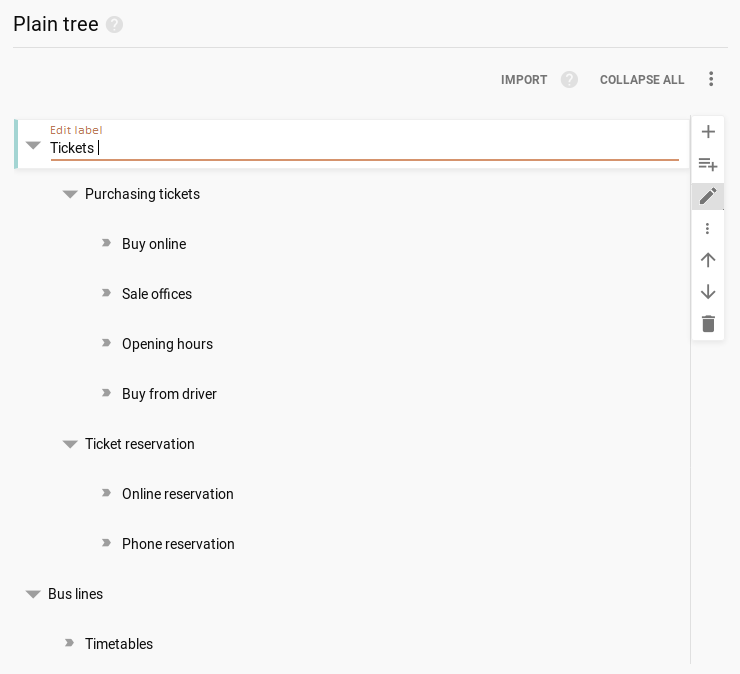
You can create a tree directly in your software. Each has a simple editor in which you add nodes (sibling and children) according to the hierarchy, can move them up and down or delete.
In this screenshot you can see a preview from UXtweak app:
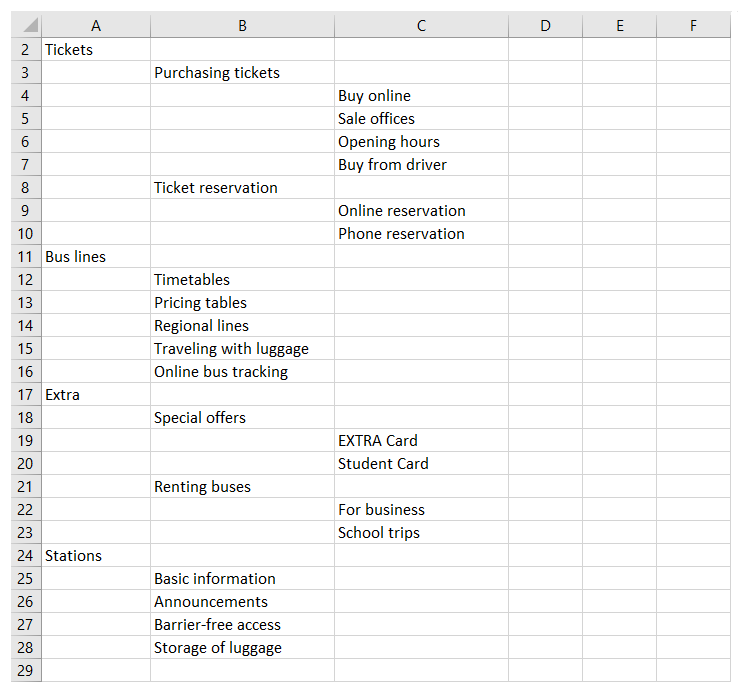
Next also very favourite option is to create your tree outside of the software in a spreadsheet (Excel, Numbers, Google Spreadsheet or any other) and upload it to your app. This is helpful if you want to work with the same tree again.
This is how the same tree can appear in a spreadsheet:
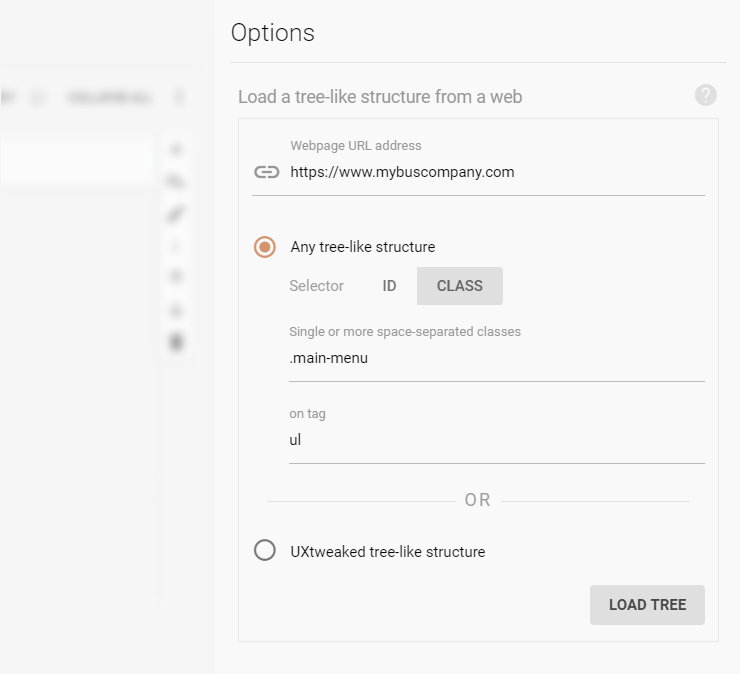
If you already have a website, then you have also third option. You can load the tree directly from the website and then adjust it as you need. You simply just type the URL to where your tree structure is located. You can grab your tree-like structure by selecting it with a CSS selector.
Be aware, that this option is yet not broadly supported by all softwares.
3 things to remember:
- Always include the whole structure of your tree.
- You can test you current tree or newly designed one.
- You don’t need any graphics to test your tree.
HOW TO SET UP TASKS FOR TREE TESTING
The tasks are the questions you ask users to complete. They are just as important as the tree itself, I would say, maybe even a bit more. The tasks should reflect a context for the tester to understand a situation he/she is in and a problem that needs to be solved.
There is always a question of how many tasks is too many. We recommended not going over 10. Sure, you would like to get as much information, as possible. But there are potential disadvantages. After couple tasks users behave differently as they know the tree and don’t do the same activity as they would be new to the website. Also there can be a information fatigue after some time, which can make them select answers without thinking to finish faster.
Next thing is using the right language and phrasing for your tasks and tree. To let users think and find the answers, you should not use the same words for tasks as you use in your tree structure. Tasks can be longer, so try to describe them in more words, so that users don’t look for the exact words in the tree. Descriptions can also help for better understanding of the tasks, as each mind is different.
Tree testing shows you whether people can find information in your website structure, so for every task you should select at least one correct destination. It is important for the later analysis of the results. You can have more destinations, as the particular piece of information can be placed on multiple places.
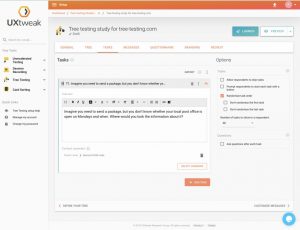
As a picture is worth 1000 words said, you can look at how tasks look. The first picture when creating the task in text editor, where you can use all the classic formatting options.
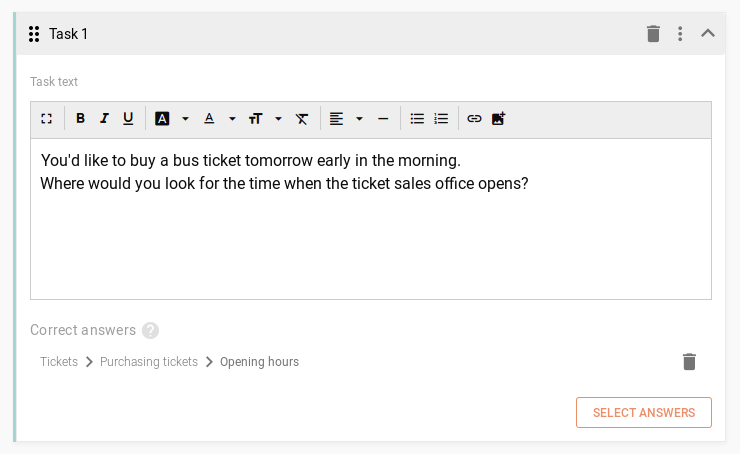
The second screenshot is how the tester sees the task during the test. So there is the task itself with the tree below with the parent nodes and then the subcategories unfold after you select one.
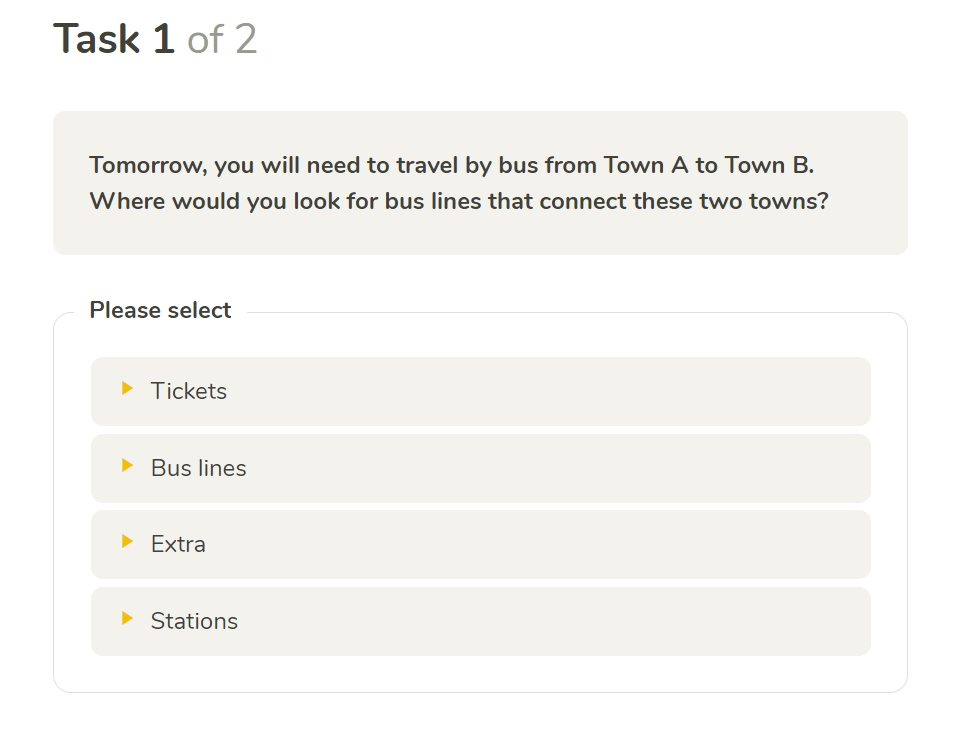
Example of a good task:
Bad: “Click where you would go to find our address.”
Good: “You’ve booked a session in one of our locations, and you want to find out how to get there.”
In the first task you tell user exactly what to do. In the second he gets more autonomy as you just describe the situation and he has to decide what to do.w
HOW TO RECRUIT PARTICIPANTS FOR TREE TESTING
You are almost done from your side. The study is ready to be launch. And you can take rest and wait for the results to appear. Not yet! Having the right testers from the right audience is crucial as relevancy matters a lot here.
In the tasks section we were talking about maximum number, here we can flip sides. We often get asked about what is the minimum testers to get relevant results. We recommend 30 as a strict minimum, but you should aim for at least 50 respondents.
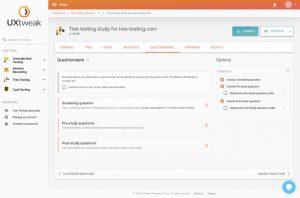
You can segment testers with a questionnaire you can use at the beginning of the test. The questions often survey the basic demographics, but it can vary from project to project. You can create your own question the get additional data from your testers.
You can also use the introduction screening, which is usually one question to find out whether the person is eligible for your test and if irrelavant it leaves him/her out of the test.
How to recruit testers
- Share a study link – you can send the link to your study directly to your customers in a newsletter, post it to your social media profiles or anywhere else
- Use a website widget – if you already have a running website with audience, this is a good choice. The Recruiter Widget by UXtweak is a small pop-up window in a corner of a screen that appears. It doesn’t disturb the user but plays out as a part of the website.
- Rent a panel audience – there are many solutions on the market that offer to “buy the audience”. You just describe what you need and they distribute the study. These testers might be people who do not know your brand neither are you customers. That is not good or bad by default, you just need to keep it in mind.
3 things to remember:
- Write clear instructions for testers.
- Manage users motivation and expectations.
- Use questionnaire the get additional data.
HOW TO ANALYZE THE RESULTS OF TREE TESTING STUDY
Alright, let’s do what you came for. Connect the dots. No matter whether it is for your boss, client or your own case, the results sell. Imagine you just got them, enough testers have told you their mind. Now we will tell you, what kind of results you can get from tree testing.
Despite the tree testing being a very easy to use methodology, it bring multiple analysis and very complex views on your information structure.
Firstly, let me tell you, you have more options how to read the results: you can that directly in the application dashboard or download them and read also offline. The offline formats are available as a spreadsheet (TreeJack) or PDF report (UXtweak), which is a great way if you need to report the results to someone outside your desk.
Data Analysis
As I told earlier, there are multiple data analysis available. Most online software start with a complex Overview to tell you the most important numbers like how many people completed the study, how much time did it the take them, followed by how many people found the right answer (the success rate) or how many people completed the test without being lost in the tree (the directness rate).
The other analysis are Respondents view, Analysis – Questionnaire, Analysis – Task Statistics, Pietree, First Click, Paths, Destinations and a very detailed Respondent results. For better understanding all of them, I would recommend you reading more about them directly at the UXtweak’s blog or Optimal Workshop’s site, where you can find explanations and screenshots of how the data.
PDF Report
Another great advantage of using online software tools is the option to generate PDF report. It is valuable especially when working in a wider environment – you can share it with your client, boss or team.
PDF report usually contains the same metrics as graphs as the online report does – Overview, Respondents view, Analysis – Questionnaire, Analysis – Task Statistics, Pietree, First Click, Paths, Destinations and a very detailed Respondent results.
Feel free to check the example of a PDF report from UXtweak as well:
3 things to remember:
- Always include the whole structure of your tree.
- You can test you current tree or newly designed one.
- You don’t need any graphics to test your tree.
TREE TESTING VS. CARD SORTING
You have most probably already heard about these two techniques. They are the most profound methods when working with information architecture. We can say they are so similar, so that they are completely different. And also complement.
Card sorting is maybe the more known one. In card sorting the tester gets a pack of cards (papers card offline or virtually online). His/her task is to group them into batches. The cardsorting can be open or closed, it depends whether you define the names of labels or not. Card-sorting is a good way to design information architecture, but not that helpful if you need to find out whether your current menu works well.
That is when it is better to used the tree-testing. Tree testing is sometimes called a reverse card sort. Instead of grouping cards into categories, testers try to place tasks into a current information architecture.
In reality, card sorting and tree testing can be seen as two different sides of the same coin. That means you will get the best results when you use both at the same time. The ongoing discussion is which one should be first in order to get the best results.
The theory we trust and do follow is that we use card sorting as a first step to get an idea of how people do think. Then we create our own structure (tree). And as a final step we do verify with tree testing.
PS: If you’d like to learn more about card sorting, we recommend visiting www.card-sorting.com.-
Is tree testing qualitative or quantitative?
Tree testing is a research method that provides quantitative results about users’ behaviours and thinking patterns. However, you can still gather qualitative results during tree testing by using session recordings during your research. For example, one of the tree testing tools, UXtweak, recommends you use 2 studies on their platform to gather qualitative insights. If you want to learn more about the process, here is a video tutorial:
When should you do tree testing?
The great thing about tree testing is that there is no wrong time to do it. This technique will be beneficial at any part of the design and development process. You can implement it at the prototyping stage to define the future structure of your website, test an already running product or make use of tree testing before the redesign.
Is tree testing a usability test?
Tree testing is a usability testing technique that is used to evaluate the UX of your digital product and gives you insights into how easy it is for the users to find the desired information on the website.
Summary
Advantages vs. disadvantages of tree-testing
The tree testing tool can be done remotely which is its biggest advantage. Therefore it is cheaper, more efficient and valuable. Another great advantage is that it can be done online, as the computer can see much more than a human researcher’s eye would do.
Indeed, these two big advantages come with some minor disadvantages. You can not ask follow-up questions, neither see the non-verbal communication of a tester. However this can be compensated when you use surveys to get instant feedback (you can do that after each and every task). Also to minimize the losses you can do a pilot testing moderated and offline.
Another both sided point is the plain format of tree testing. The visual essentialism make it a bit harder to imagine the behaviour online, but also makes it easier to focus on the task and understanding the text.
To sum it up, tree testing is not good or bad. It is just of many tools you can use and it is strongest when combined with the others from your toolkit. It is not a saviour, but it can be of great help to make your project better.
10 things you should never skip:
- Always set your goals before even starting.
- Focus on what part of your website or hypothesis you want to test.
- Make sure you use the whole tree and not just a part.
- Put your tasks into a context.
- Be careful about the number of tasks you test.
- Use language your testers will understand, but different from a tree.
- Create a questionnaire for your testers so that you can filter the results.
- Write clear instructions and hints.
- Look at the data from various angles, filter them correctly.
- Enjoy your tree testing!
